
NorCal Dave
Senior Member.
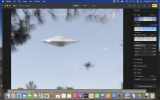
A few more tries. This time staying simple and using a paper cutout of the UFO as suggested by @Z.W. Wolf in another thread. Shot it in cinematic mode on an iPhone so that I could vary the focus, then screen shot what seemed a couple of ok shots. Cropped them and tried 2 different filters. Top is MS photo editor with color saturation lowered and the "burn" filter. Second shot is Mac photo editor with color saturation lowered and the "grain" turned up to approximate an older picture. Original of the first one is below.
The paper model is not to my liking yet. I had some heavy black roofing paper so used that, then folded it and put some silver paint on the top half for a little contrast but didn't really seem to work. May just be that the sun is at the wrong angle and is not highlighting the top enough. May try again or switch to thin plywood as the wind is kicking up.
The big challenge is still controlling the focus. Phone cameras and most new cameras want to focus on "something". If I had a full manual camera, I think I would focus on the closer in model, making the further trees and even closer plane out of focus, then slightly de-focus the model. That would leave the model the sharpest element, but still slightly fuzzy.


Here's a close up of the plane from the first photo. I think it's holding up ok.

The paper model is not to my liking yet. I had some heavy black roofing paper so used that, then folded it and put some silver paint on the top half for a little contrast but didn't really seem to work. May just be that the sun is at the wrong angle and is not highlighting the top enough. May try again or switch to thin plywood as the wind is kicking up.
The big challenge is still controlling the focus. Phone cameras and most new cameras want to focus on "something". If I had a full manual camera, I think I would focus on the closer in model, making the further trees and even closer plane out of focus, then slightly de-focus the model. That would leave the model the sharpest element, but still slightly fuzzy.
Here's a close up of the plane from the first photo. I think it's holding up ok.

")